Table of Contents
Logic Analyzer
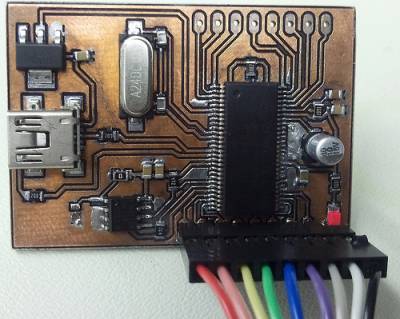
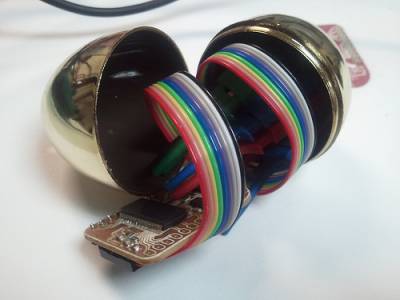
Latest version NullSpace Logic Analyser Egg by charlie _x
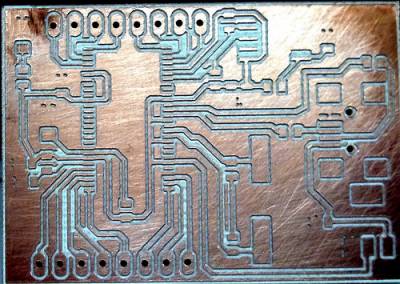
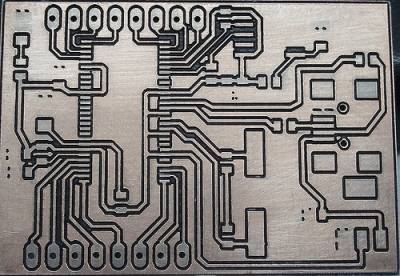
Acid FeCl etched for one minute after cnc mill to clean up burrs

Details
- 8 channels
- 5V tolerant
- High Speed USB
- Some free software
- Cost is currently about $28 each (Including all parts and PCB, excluding jumper wires to connect to device under test)
- 4th revision of the board has been designed and verified.
 * 5th revision is laid out to be smaller and doesn't have the second 9 pin header
 * 6th revision is VFBGA muh ha ha ha ha [[AnnaLogicBGA]]
Software
- 032 SVN Schematic and Board layout in Eagle
- SIGROK (you can find out what it is here)
Programming
Step:
- Download CySuiteUSB and install it, locallly cache copy cysuiteusb_3_4_7_b204.zip
- Edit the “\\Cypress\\Cypress Suite USB 3.4.6\\Driver\\bin\\wxp\\x64\\cyusb.inf” file - uncomment and edit the device id's into the proper section:
- e.g. for 64bit windows 7:
- %VID_04B4&PID_8613.DeviceDesc%=CyUsb, USB\\VID_04B4&PID_8613
- Plug in the AnnaLogic and go to the Device Manager, right click on the “Unknown Device”, then “Update Driver Software”. Force the driver found in the Cypress folder “\\Cypress\\Cypress Suite USB 3.4.6\\Driver\\bin\\wxp\\x64\\”.
- Sign the Driver using driver enforcement overrider
- Open up CyConsole and upload the new EEPROM file
Datasheets
BOM
Notes: Changed to 9 pin headers <html> <p> <table> <tr><td>Part</td><td>Value</td><td>Device</td><td>Package</td><td>Description</td></tr> <tr><td>C1</td><td>12pF</td><td>CAP0805</td><td>0805</td><td>Capacitor</td></tr> <tr><td>C2</td><td>12pF</td><td>CAP0805</td><td>0805</td><td>Capacitor</td></tr> <tr><td>C3</td><td>1uF</td><td>CAP0805</td><td>0805</td><td>Capacitor</td></tr> <tr><td>C4</td><td>1uF</td><td>CAP0805</td><td>0805</td><td>Capacitor</td></tr> <tr><td>C5</td><td>100nF</td><td>CAP0805</td><td>0805</td><td>Capacitor</td></tr> <tr><td>C6</td><td>100nF</td><td>CAP0805</td><td>0805</td><td>Capacitor</td></tr> <tr><td>C7</td><td>100nF</td><td>CAP0805</td><td>0805</td><td>Capacitor</td></tr> <tr><td>C8</td><td>100nF</td><td>CAP0805</td><td>0805</td><td>Capacitor</td></tr> <tr><td>C9</td><td>100nF</td><td>CAP0805</td><td>0805</td><td>Capacitor</td></tr> <tr><td>D1</td><td>1n4148</td><td>DIODESOD</td><td>SOD-323</td><td>Diode</td></tr> <tr><td>IC1</td><td>CY7C68013A-56PVXC</td><td>CY7C68013A-56PVXC</td><td>SSOP56</td><td>EZ-USB FX2LP (TM) USB Microcontroller</td></tr> <tr><td>IC2</td><td>LM1117 3.3V</td><td>LM1117</td><td>SOT223</td><td></td></tr> <tr><td>LED1</td><td>Blue</td><td>LED1206</td><td>LED-1206</td><td>LEDs</td></tr> <tr><td>Q1</td><td>24Mhz</td><td>CRYSTALTWO-PADTWO-PAD</td><td>CRYSTAL-SMD-TWO-PAD</td><td>Crystals</td></tr> <tr><td>R3</td><td>4.7K</td><td>RESISTOR</td><td>0805</td><td>Resistor</td></tr> <tr><td>R4</td><td>4.7K</td><td>RESISTOR</td><td>0805</td><td>Resistor</td></tr> <tr><td>R5</td><td>0</td><td>RESISTOR1206</td><td>1206</td><td>Resistor</td></tr> <tr><td>R7</td><td>100K</td><td>RESISTOR</td><td>0805</td><td>Resistor</td></tr> <tr><td>R8</td><td>1K</td><td>RESISTOR</td><td>0805</td><td>Resistor</td></tr> <tr><td>R9</td><td>1K</td><td>RESISTOR</td><td>0805</td><td>Resistor</td></tr> <tr><td>SV1</td><td>8 Pin header</td><td>FE09-1</td><td>FE09</td><td>FEMALE HEADER</td></tr> <tr><td>SV2</td><td>9 Pin header</td><td>FE09-1</td><td>FE09</td><td>FEMALE HEADER</td></tr> <tr><td>U1</td><td></td><td>MCP24AA32</td><td>SOT23-5</td><td>Microchip 32K (4K x 8) 1.8V I2C EEPROM</td></tr> <tr><td>X1</td><td>USBSMD</td><td>USBSMD</td><td>USB-MINIB</td><td>USB Connectors</td></tr> </table> </html>
NEWARK BOM (current)
Click to buy from Newark $18 Cheaper to buy Cypress chip from cypress If you buy it from cypress, make sure you delete it from the newark order!
- Farnell/Newark BOM
<html>
<table> Quantity\tValue\tPackage\tOrder code\tManufacturer\tManuf. Code\tAvailability\tPrice (from)\tDescription <tr><td>2</td><td>12pF</td><td>0805</td><td><A HREF=“http://www.newark.com/jsp/search/productdetail.jsp?sku=64K2898”>64K2898</A></td><td>KEMET</td><td>C0805C120J5GACTU</td><td>4132</td><td>0.0070</td><td>KEMET - C0805C120J5GACTU - CAPACITOR CERAMIC 12PF, 50V, C0G, 0805</td></tr> <tr><td>2</td><td>1uF</td><td>0805</td><td><A HREF=“http://www.newark.com/jsp/search/productdetail.jsp?sku=90R7762”>90R7762</A></td><td></td><td>C2012Y5V1C105Z/0.85</td><td>5943</td><td>0.01</td><td>TDK - C2012Y5V1C105Z/0.85 - CAPACITOR CERAMIC, 1UF, 16V, Y5V, 0805</td></tr> <tr><td>5</td><td>100nF</td><td>0805</td><td><A HREF=“http://www.newark.com/jsp/search/productdetail.jsp?sku=38K1694”>38K1694</A></td><td>FARNELL</td><td>GRM21BR71H104KA01L</td><td>16494</td><td>0.043</td><td>MURATA - GRM21BR71H104KA01L - CAPACITOR, 0805 100NF 50V CAPACITOR, 0805 100NF 50V</td></tr> <tr><td>1</td><td>1n4148</td><td>SOD-323</td><td><A HREF=“http://www.newark.com/jsp/search/productdetail.jsp?sku=35K9698”>35K9698</A></td><td>VISHAY/TELEFUNKEN</td><td>1N4148W-V-GS08</td><td>60999</td><td>0.02</td><td>VISHAY SEMICONDUCTOR - 1N4148W-V-GS08 - SWITCHING DIODE, 100V 150mA SOD-323</td></tr> <tr><td>1</td><td>CY7C68013A-56PVXC</td><td>SSOP56</td><td><A HREF=“http://www.newark.com/jsp/search/productdetail.jsp?sku=19M7114”>19M7114</A></td><td>CYPRESS SEMICONDUCTOR CORPORAT</td><td>CY7C68013A-56PVXC</td><td>130</td><td>10.22</td><td>CYPRESS SEMICONDUCTOR - CY7C68013A-56PVXC - IC, 8BIT MCU, 8051, 48MHZ, SSOP-56</td></tr> <tr><td>1</td><td>LM1117 3.3V</td><td>SOT223</td><td><A HREF=“http://www.newark.com/jsp/search/productdetail.jsp?sku=13B5343”>13B5343</A></td><td>NATIONAL SEMICONDUCTOR</td><td>LM1117MPX-3.3</td><td>4468</td><td>0.479</td><td>NATIONAL SEMICONDUCTOR - LM1117MPX-3.3 - IC, LDO VOLT REG, 3.3V, 0.8A, SOT-223-3</td></tr> <tr><td>1</td><td>Blue</td><td>LED-1206</td><td><A HREF=“http://www.newark.com/jsp/search/productdetail.jsp?sku=75R0591”>75R0591</A></td><td></td><td>5988210107F</td><td>7900</td><td>0.041</td><td>DIALIGHT - 5988210107F - LED, 1206, RED, 80MCD, 635NM</td></tr> <tr><td>1</td><td>24Mhz</td><td>CRYSTAL-SMD-TWO-PAD</td><td><A HREF=“http://www.newark.com/jsp/search/productdetail.jsp?sku=13J1723”>13J1723</A></td><td>Abracon Corporation</td><td>ABM3-24.000MHZ-B2-T</td><td>2718</td><td>0.705</td><td>ABRACON - ABM3-24.000MHZ-B2-T - CRYSTAL, 24MHZ, 18PF, SMD</td></tr> <tr><td>2</td><td>4.7K</td><td>0805</td><td><A HREF=“http://www.newark.com/jsp/search/productdetail.jsp?sku=59M6911”>59M6911</A></td><td></td><td>CRCW08054K70JNEA</td><td>34750</td><td>0.0090</td><td>VISHAY DALE - CRCW08054K70JNEA - RESISTOR, THICK FILM, 4.7KOHM, 125mW, 5%</td></tr> <tr><td>1</td><td>0</td><td>1206</td><td><A HREF=“http://www.newark.com/jsp/search/productdetail.jsp?sku=36C9806”>36C9806</A></td><td>VISHAY/DALE</td><td>CRCW12060000ZSTA</td><td>60093</td><td>0.02</td><td>VISHAY DALE - CRCW12060000ZSTA - RESISTOR, CHIP, JUMPER, ZERO OHM, 250mW</td></tr> <tr><td>1</td><td>100K</td><td>0805</td><td><A HREF=“http://www.newark.com/jsp/search/productdetail.jsp?sku=01P2111”>01P2111</A></td><td></td><td>MCTF0805DTC1002</td><td>14239</td><td>0.02</td><td>MULTICOMP - MCTF0805DTC1002 - RESISTOR, THIN FILM, 10KOHM, 100mW, 0.5%</td></tr> <tr><td>2</td><td>1K</td><td>0805</td><td><A HREF=“http://www.newark.com/jsp/search/productdetail.jsp?sku=01P2109”>01P2109</A></td><td></td><td>MCTF0805DTC1001</td><td>12549</td><td>0.014</td><td>MULTICOMP - MCTF0805DTC1001 - RESISTOR, THIN FILM, 1KOHM, 100mW, 0.5%</td></tr> <tr><td>1</td><td>8 Pin header</td><td>FE09</td><td><A HREF=“http://www.newark.com/jsp/search/productdetail.jsp?sku=unknown”>unknown</A></td><td></td><td></td><td></td><td></td><td></td></tr> <tr><td>1</td><td>9 Pin header</td><td>FE09</td><td><A HREF=“http://www.newark.com/jsp/search/productdetail.jsp?sku=unknown”>unknown</A></td><td></td><td></td><td></td><td></td><td></td></tr> <tr><td>1</td><td></td><td>SOT23-5</td><td><A HREF=“http://www.newark.com/jsp/search/productdetail.jsp?sku=62K0574”>62K0574</A></td><td>MICROCHIP</td><td>24LC00T-I/OT</td><td>1895</td><td>0.19</td><td>MICROCHIP - 24LC00T-I/OT - IC, EEPROM 128BIT SERIAL 400KHZ SOT-23-5</td></tr> <tr><td>1</td><td>USBSMD</td><td>USB-MINIB</td><td><A HREF=“http://www.newark.com/jsp/search/productdetail.jsp?sku=16M2760”>16M2760</A></td><td></td><td>1734035-1</td><td>16809</td><td>0.596</td><td>TYCO ELECTRONICS / AMP - 1734035-1 - MINI USB TYPE B CONNECTOR, RCPT 5POS SMD</td></tr> </table> </html>
Build ( Version 1 )
- Step 1. Add the Cypress chip.
<html> <a href=“http://www.flickr.com/photos/51925658@N08/5408723005/” title=“Add cypress chip by charlie _x, on Flickr”><img src=“http://farm5.static.flickr.com/4101/5408723005_d5676d5abf.jpg” width=“500” height=“352” alt=“Add cypress chip” /></a> </html> add the cypress chip, orientate, align pads, tag one pin on one corner, recheck alignment, tag opposite diagonal corner, recheck alignment, fix if moved, once its square tag other 2 corners then lay a line of thing solder paste across the pins and solder one leg at a time. Lots of flux. Use a line of very thin paste over the pins, close to the bend, then put the iron between the legs and hold it for about 3/4“ of a second, give the chip some time to cool down, so do 4 sets of pins, let it cool, then another four. The larger blobs of solder are partially because of the camera, i use the ground plane to remove excess solder from the tip of my iron as i work, this helps to reduce bridging. Obviously this only works when there is no solder mask, use a scrap piece of copper or a sponge instead.
- Step 2.
Add 0805 R10K R7 resistor <html> <a href=“http://www.flickr.com/photos/51925658@N08/5411230593/” title=“DSC00325 by charlie _x, on Flickr”><img src=“http://farm6.static.flickr.com/5094/5411230593_36d11c7d4c.jpg” width=“500” height=“375” alt=“DSC00325” /></a> </html>
- Step 3.
Add 0805 1K R8 resistor <html> <a href=“http://www.flickr.com/photos/51925658@N08/5411230785/” title=“DSC00326 by charlie _x, on Flickr”><img src=“http://farm6.static.flickr.com/5216/5411230785_7c71315d41.jpg” width=“500” height=“375” alt=“DSC00326” /></a> </html>
- Step 4.
Add the 1uF 0805 capacitor C3 <html> <a href=“http://www.flickr.com/photos/51925658@N08/5411226261/” title=“DSC00327 by charlie _x, on Flickr”><img src=“http://farm5.static.flickr.com/4131/5411226261_6ef757b285.jpg” width=“500” height=“492” alt=“DSC00327” /></a> </html>
- Step 5.
Add the C6 0805 100nF cap. <html> <a href=“http://www.flickr.com/photos/51925658@N08/5411837616/” title=“Add C6 0805 100nF cap by charlie _x, on Flickr”><img src=“http://farm6.static.flickr.com/5096/5411837616_6ba4446f45.jpg” width=“475” height=“500” alt=“Add C6 0805 100nF cap” /></a> </html>
- Step 6.
Add the 0805 C9 100nF Cap <html> <a href=“http://www.flickr.com/photos/51925658@N08/5411226625/” title=“DSC00329 by charlie _x, on Flickr”><img src=“http://farm5.static.flickr.com/4097/5411226625_9e45f3b09c.jpg” width=“500” height=“375” alt=“DSC00329” /></a> </html>
- Step 7.
Add the 10uF electrolytic cap, orientation matters <html> <a href=“http://www.flickr.com/photos/51925658@N08/5411226827/” title=“DSC00330 by charlie _x, on Flickr”><img src=“http://farm5.static.flickr.com/4081/5411226827_d24a51c725.jpg” width=“375” height=“500” alt=“DSC00330” /></a> </html>
- Step 8.
Add the 0805 1K resistor R9. <html> <a href=“http://www.flickr.com/photos/51925658@N08/5411838218/” title=“DSC00331 by charlie _x, on Flickr”><img src=“http://farm6.static.flickr.com/5054/5411838218_cd9bd7c592.jpg” width=“500” height=“375” alt=“DSC00331” /></a> </html>
- Step 9.
Add the 1206 LED, orientation matters use a diode check on a multimeter to check the polarity of the LED <html> <a href=“http://www.flickr.com/photos/51925658@N08/5411227239/” title=“DSC00332 by charlie _x, on Flickr”><img src=“http://farm5.static.flickr.com/4103/5411227239_41ff44438b.jpg” width=“500” height=“375” alt=“DSC00332” /></a> </html>
- Step 10.
Add 0805 4.7K resistor R4. <html> <a href=“http://www.flickr.com/photos/51925658@N08/5411838556/” title=“DSC00333 by charlie _x, on Flickr”><img src=“http://farm6.static.flickr.com/5176/5411838556_03df8b1bb7.jpg” width=“500” height=“436” alt=“DSC00333” /></a> </html>
- Step 11.
Add 0808 4.7K resistor R3 <html> <a href=“http://www.flickr.com/photos/51925658@N08/5411227661/” title=“DSC00334 by charlie _x, on Flickr”><img src=“http://farm6.static.flickr.com/5251/5411227661_d2b04e6635.jpg” width=“500” height=“375” alt=“DSC00334” /></a> </html>
- Step 12.
Add 0805 capacitor 100nF C8. (This moves on the final revision of the board) <html> <a href=“http://www.flickr.com/photos/51925658@N08/5411839018/” title=“DSC00335 by charlie _x, on Flickr”><img src=“http://farm6.static.flickr.com/5216/5411839018_0307ff6494.jpg” width=“500” height=“375” alt=“DSC00335” /></a> </html>
- Step 13.
Add the C7 0806 Capacitor 100nF <html> <a href=“http://www.flickr.com/photos/51925658@N08/5411839284/” title=“DSC00336 by charlie _x, on Flickr”><img src=“http://farm6.static.flickr.com/5092/5411839284_3ea85507d7.jpg” width=“375” height=“500” alt=“DSC00336” /></a> <BR>
- Step 14.
<BR> Add 0 0hm 0805 resistor R1. <BR> <html> <a href=“http://www.flickr.com/photos/51925658@N08/5411228279/” title=“DSC00337 by charlie _x, on Flickr”><img src=“http://farm5.static.flickr.com/4104/5411228279_451064301c.jpg” width=“375” height=“500” alt=“DSC00337” /></a> </html>
- Step 15.
Add AT24C128 Chip, orientation matters, dot goes towards middle of board. Use preprogrammed chip <html> <a href=“http://www.flickr.com/photos/51925658@N08/5411839652/” title=“DSC00338 by charlie _x, on Flickr”><img src=“http://farm5.static.flickr.com/4151/5411839652_c94b214bc2.jpg” width=“500” height=“375” alt=“DSC00338” /></a> </html>
- Step 16.
Add 20Ohm 080 resistor R6 <html> <a href=“http://www.flickr.com/photos/51925658@N08/5411228751/” title=“DSC00339 by charlie _x, on Flickr”><img src=“http://farm6.static.flickr.com/5133/5411228751_78fe68c5dd.jpg” width=“500” height=“278” alt=“DSC00339” /></a> </html>
- Step 17.
Add 20 Ohm 0805 resistor R5 <html> <a href=“http://www.flickr.com/photos/51925658@N08/5411228963/” title=“DSC00340 by charlie _x, on Flickr”><img src=“http://farm5.static.flickr.com/4094/5411228963_49653cf570.jpg” width=“500” height=“375” alt=“DSC00340” /></a> </html>
- Step 18.
Add 12pF 0805 capacitor C1. <html> <a href=“http://www.flickr.com/photos/51925658@N08/5411840284/” title=“DSC00341 by charlie _x, on Flickr”><img src=“http://farm5.static.flickr.com/4132/5411840284_7ebbdffbfe.jpg” width=“500” height=“375” alt=“DSC00341” /></a> <BR>
- Step 19.
<BR> Add 12pF 0805 capacitor C2 <BR> <html> <a href=“http://www.flickr.com/photos/51925658@N08/5411840482/” title=“DSC00342 by charlie _x, on Flickr”><img src=“http://farm6.static.flickr.com/5252/5411840482_b05c7debde.jpg” width=“500” height=“375” alt=“DSC00342” /></a> </html>
- Step 20.
Add 0805 100nF capacitor C5 <html> <a href=“http://www.flickr.com/photos/51925658@N08/5411840662/” title=“DSC00343 by charlie _x, on Flickr”><img src=“http://farm6.static.flickr.com/5257/5411840662_9ed508a6b2.jpg” width=“500” height=“375” alt=“DSC00343” /></a> </html>
- Step 21.
Add the 24MHz XTAL Q1. <html> <a href=“http://www.flickr.com/photos/51925658@N08/5411229699/” title=“DSC00344 by charlie _x, on Flickr”><img src=“http://farm6.static.flickr.com/5252/5411229699_87738e1113.jpg” width=“500” height=“375” alt=“DSC00344” /></a> </html>
- Step 22.
Add the 3.3v LM1117 regulator IC2 <html> <a href=“http://www.flickr.com/photos/51925658@N08/5411841076/” title=“Add 3.3V regulator by charlie _x, on Flickr”><img src=“http://farm6.static.flickr.com/5300/5411841076_423d072abb.jpg” width=“500” height=“335” alt=“Add 3.3V regulator” /></a></html>
- Step 23.
Add USB and header <html> <a href=“http://www.flickr.com/photos/51925658@N08/5410336742/” title=“Nullalyser = built and tested by charlie _x, on Flickr”><img src=“http://farm5.static.flickr.com/4092/5410336742_c1466ff4c9.jpg” width=“500” height=“399” alt=“Nullalyser = built and tested” /></a> </html> And you're done
Debugging the Design
Later versions of the software stopped working with most of the designs out there. Initially we looked at the I2C/SPI EEPROM contents by attaching it to a breakout board and reading it. After tracking down the chip type ( knowing its an small i2c/spi EEPROM with a SOT-23-6 package). So after plugging it into a chip reader and checking the results. It showed the chip repeated the VID/PID plus some extra data, after changing the chip type that wasn't the issue. Then we looked at the _RESET line. USB wants the reset to be at least 5ms but no longer than 500ms. I used a 10uF capacitor, so we dropped that down to 1uF but left the resistor alone, that didn't change things other than make the USB more flakey on hub's and other PC's ( propagation delays). Most chip manufacturers have reference data sheets ( See Link #1 below ) and a schematic design rule check. It specifies 12pF each for XTAL starting caps, and not to use any resistors at all on the USB. So those are the changes we'll make next. I'm leaning towards it being a chip reset/boot time problem.The resistors probably aren't causing this, but we'll change them out anyway and look at the results Next step is to change the resistor/cap on the reset line and look at the reset line with a logic analyser, yes we're using the same device to debug itself ! After some pondering, another issue might be that the discharge time on the capacitor on the _RESET line, when power off ocurrs ( possibly during the firmware upload) the cap will slowly discharge, if the discharge time isn't faster than the time for the power to cycle ( has to to drop below logic 1 voltage) there will be no reset. Adding a diode across the resistor will cause the cap to discharge very quickly We removed the whole reset circuitry from the original, no difference. So next step is to swap the cypress chip with a new one.With a logic analyser we determined the problem!
Links
Success
- Tom1 aww yeah
- Peachy
- Spamsickle
- blakangel (first smd soldering experience, gluten-free solder)
- Your name here


