Table of Contents
The [[NSL]] Graphtec CE3000-60 MK2 Vinyl Cutter/Plotter
So you heard that we have a vinyl cutter and want to make rad stickers for your friends? Well yes, you can do that with the vinyl cutter. However, the Graphtec CE3000-60MK2, being a hallmark of intuitive design, can be pretty tricky to use for a first timer. PLEASE read and re-read this wiki article several times before giving the cutter a go, and if you still have questions please wait until CHS is at the space, and he can help you out.
What do you need?
You will need appropriate vector artwork in a format that is readable by Inkscape.
What's a vector?
In simple terms, it's a drawing composed of lines and shapes, rather than pixels. To learn more, read: Vector Graphics
Prepare your vector graphic for cutting.
The graphic must be composed of ONLY lines, with no fill or text. If you have text to print you'll have to convert it to paths, which is easy to do in Inkscape. In fact, all shapes should be converted to paths before printing to make sure everything works. You can click on the following images for a larger view.
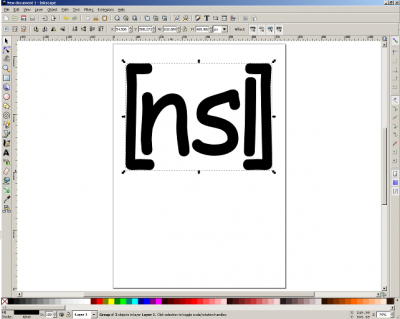
- Open up your vector image, or create one:
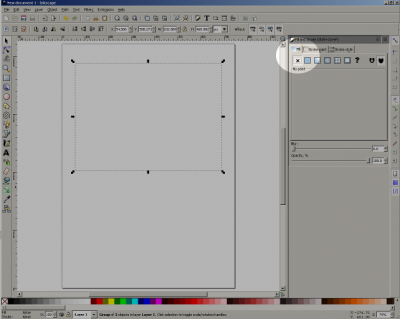
- Open the “Fill and Stroke” dialog with “Object → Fill and Stroke” or the keyboard combo Shift+Ctrl+F
- Select the “Fill” tab and click the “X”:
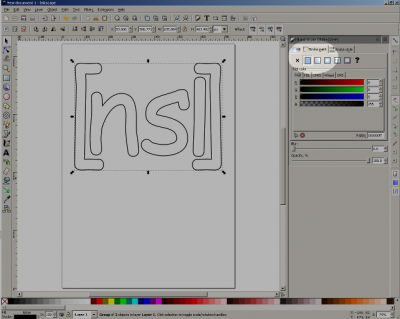
- Select the “Stroke paint” tab and click the solid square:
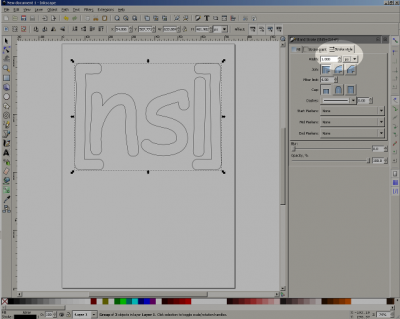
- Select the “Stroke style” tab and set “Width” to 1.000 px:
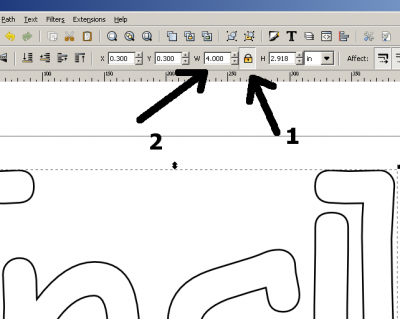
- At this point make sure that the design is the size you want. Click on the lock icon to keep your aspect ratio constrained, then change the width/height to match the final dimensions of the design you want.
Lay out your documents.
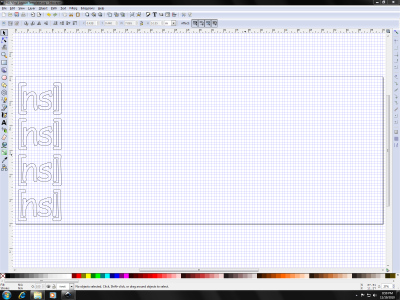
- Open up the “NSL Vinyl Template.svg” file on the desktop of the vinyl cutting machine
- Lay out your graphic on the left hand side of the template. The left hand side is the side that will be printed out of the vinyl cutter. It's 24“ wide.
- :NOTE: It is very important that you leave a 1” margin between your design and the edge of the template document. For strange reasons unknown to us, there seems to be these magical invisible margins where the vinyl cutter just won't cut, and it's not very consistent. We haven't gone through the whole manual in order to figure this out. In the meantime, just leave a 1“ margin and you'll be fine.
- Power cycle the vinyl cutter. It will ask you to press “Enter”. Press “Enter”. This will reset the vinyl cutter, and zero it out for your print.
Align the rollers
With the cutter turned off, make sure that the left roller is set to the width of the vinyl. The cutter will not cut past the left edge!. To align the roller, first disengage the roller from the sheet using the latch on the right, behind the printer. Then slide the left roller to the new position. The left roller has to be aligned over one of the blue tape regions (corresponding to rough spots on the roller bar under the rubber roller).
Print your document.
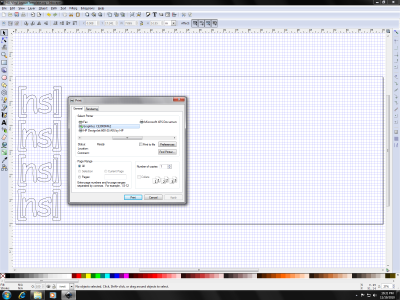
- Choose File → Print and select the Graphtec CE3000MK2 Printer:
- Select “Print”. An icon will pop up on the desktop, directing you to the vinyl cutter printing preferences:
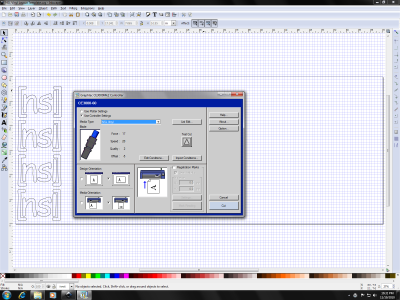
- For “Media Type”, make sure “NSL Vinyl” is selected. “NSL Vinyl” is a media that has already been calibrated for the vinyl and cutter that we have.
- Make sure that “Design Orientation” and “Media Orientation” are the two right-most selections, as pictured.
- When your layout is done and looks appropriate, click on the “Cut” button to send the design to the vinyl cutter.
Congratulations! You should have a sticker now!
- If for some reason you screwed up, contact CHS so that you can receive a proper lambasting and education on how to do this properly. Also, put money in the kitty to pay for wasted vinyl.
Peel it!
Links/Files/More Information
- Graphtec CE3000MK2 Series vinyl cutter/plotter
- Graphtec CE3000MK2 Series vinyl cutter/plotter manual ce3000mk2-um-153-2.pdf
- The vinyl cutter uses:
- :CB09 blades and blade holders. This is what's installed in the machine and is for general purpose use and for cutting materials less than .25mm thick. Right now we could use some spare blades.
- :CB15 blades and blade holders for thicker material up to .50mm thick. We do not currently have a CB15 blade holder or blades.
- Good place for vinyl/application tape: Sign Supply
- :641 Series Economy Calendered 4 year outdoor, $20/10yds - 24” wide
- If you need a fresh copy of the layout template, you can download it here: NSL_Vinyl_Layout_Template.svg
- :Wiki markup is a little weird, so you'll have to click on that link, and then at the next page right-click the file name and select “Save link as…”
- :If there is vinyl in the machine less than 24“ wide, change the document properties height to whatever your vinyl width is. Yes, Height.
Replacement Blades
The Vinyl Cutter uses this holder, which takes Roland blades like these.
